Follow Me On Social Media!

Candy Cane Icebox Cake: The Ultimate Holiday Indulgence
Introduction to Candy Cane Icebox Cake
When the holidays roll around, the craving for festive treats crescendos, and the Candy Cane Icebox Cake shines like a beacon of sweetness. This delightful dessert is not just a feast for the eyes; it’s a sensory experience that captures the spirit of the season. Imagine layers of creamy goodness alternating with crunchy, peppermint-flavored cookies, all enveloped in a dreamy whipped topping. The vibrant colors and flavors echo a winter wonderland, transforming your dessert spread into a true celebration of the season.
Creating a candy cane icebox cake brings a few joyful surprises. It’s incredibly simple to make, requiring minimal effort yet delivering maximum impact. As a busy young professional, there’s nothing better than a dessert that requires no baking and can be prepped in advance! The beauty of this cake is in its versatility; you can prepare it the night before your holiday gathering, then pop it into the fridge to chill. This not only allows you extra time with family and friends but also builds anticipation—who doesn’t get excited for layers of creamy peppermint bliss?
But why is this iced dessert such a favorite during the holidays? The combination of refreshing peppermint and rich creaminess evokes the essence of winter celebrations. Each slice offers a satisfying crunch from the cookies and a cool burst of flavor that rivals any holiday candy cane. Plus, this cake can easily accommodate dietary preferences, making it a perfect choice for gatherings where guests have varying tastes.
In the following sections, I will guide you through the essential ingredients and step-by-step instructions for crafting your very own candy cane icebox cake. Whether you’re hosting a holiday party or treating yourself on a wintry night, this cake promises to be a delightful addition to your festivities. Get ready to impress everyone with this quintessential holiday dessert!

Key Ingredients for Candy Cane Icebox Cake
Creating a delightful candy cane icebox cake is all about finding the right ingredients that come together to evoke the spirit of the holiday season. Let’s break down these essential components that make this dessert a festive favorite.
-
Graham Crackers: I love using graham crackers as the base for this cake due to their slight sweetness and crisp texture. Not only do they provide a wonderful crunch, but they also absorb flavors beautifully, making each layer a treat.
-
Whipped Cream: Freshly whipped cream is key for keeping our cake light and fluffy. It adds a luscious layer to the dessert while perfectly balancing the sweetness of the other ingredients.
-
Cream Cheese: Using softened cream cheese gives the cake a rich, creamy layer that perfectly complements the whipped cream. It adds both flavor and texture, making each bite delightful.
-
Candy Canes: The star of this candy cane icebox cake is, of course, the candy canes! Crushed for a festive touch, they provide a minty crunch that ties in beautifully with the rich cream layers.
-
Powdered Sugar: A sprinkle of powdered sugar is essential for sweetness and helps to stabilize the whipped cream, ensuring it stays fluffy throughout the chilling process.
-
Vanilla Extract: A splash of pure vanilla extract enhances the flavor profile of the cake, adding warmth and depth to each layer.
With these key ingredients, your candy cane icebox cake will not just be a dessert but a memorable centerpiece for your holiday spread!
Why You’ll Love This Candy Cane Icebox Cake
Imagine a dessert that embodies the joy of the holiday season while being refreshingly easy to prepare. The candy cane icebox cake is exactly that—a delightful treat that captures the essence of winter festivities. With layers of creamy goodness and a festive crunch, this cake reinvents the way we celebrate with sweets.
Effortless Indulgence
One of the best things about this candy cane icebox cake is its simplicity. You won’t need advanced baking skills or a multitude of fancy equipment to create this masterpiece. Just grab some ladyfinger cookies, a few cream ingredients, and those iconic candy canes, and you’re on your way to dessert bliss!
Perfect for Any Occasion
Whether you’re hosting a cozy get-together or simply want to bring a sweet surprise to your office potluck, this cake is versatile enough for any gathering. With its striking layers and festive flair, it’s bound to impress guests and spark joy.
A Christmas Classic
With every bite, you’ll taste the refreshing peppermint flavor, making it a perfect addition to your holiday dessert table. It’s like diving into a cup of hot cocoa on a chilly day—comforting and filled with cheer. Allow the layers to set overnight, and you’ll be rewarded with a smooth and creamy treat that melts in your mouth.
So, why not elevate your dessert game this season? Bring home the joy and flavors of the holidays with this delightful candy cane icebox cake.

Variations of Candy Cane Icebox Cake
The Candy Cane Icebox Cake is a delightful treat that celebrates the flavors of the holiday season, but did you know there are several creative twists you can explore? Here are a few variations that can elevate this classic dessert.
Chocolate Mint Version
Swap out the vanilla wafers for chocolate wafers for a rich and decadent chocolate mint twist. Instead of the traditional vanilla filling, use chocolate whipped cream. The combination of chocolate and mint speaks to the holiday spirit, delivering both comfort and elegance.
Peppermint Bark Layer
For an extra layer of flavor and texture, consider adding crushed peppermint bark between the layers. This will not only enhance the candy cane icebox cake experience but also provide a satisfying crunch that contrasts beautifully with the creaminess.
Berry Bliss
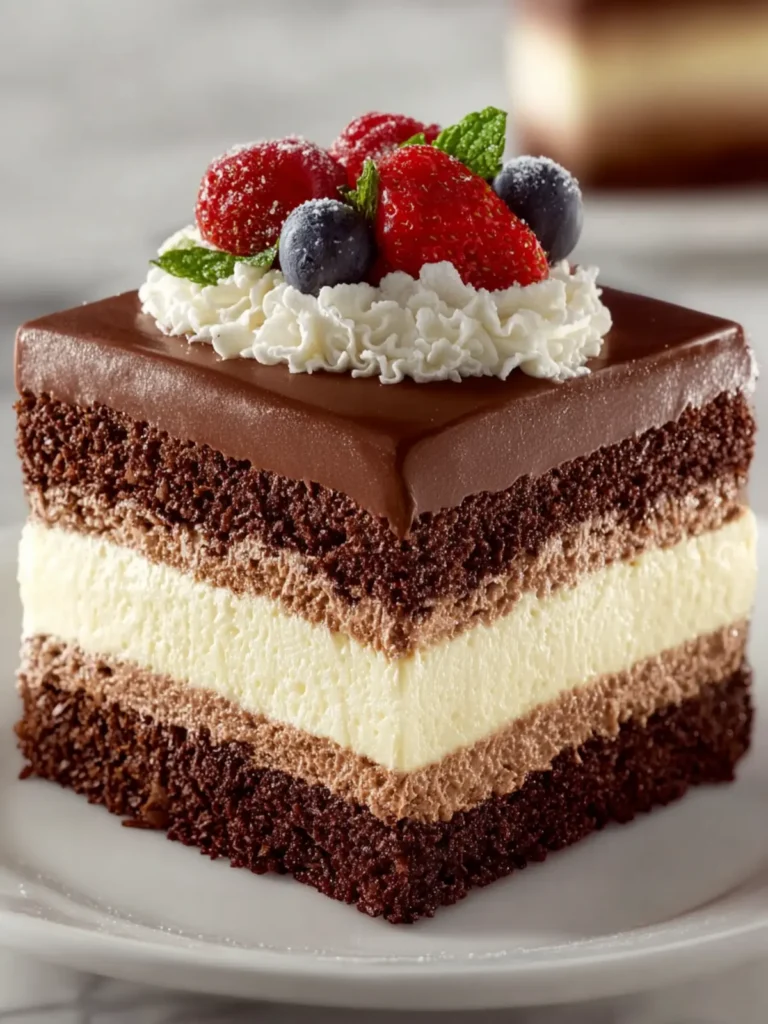
Incorporate berries, such as raspberries or strawberries, into the cake for a fruity flair. Layer in some homemade berry sauce along with the whipped cream. The tartness of the berries cuts through the sweetness, creating a refreshing balance.
Nutty Delight
Add chopped nuts, such as almonds or walnuts, between the layers for a delightful crunch and nuttiness. This variation not only adds flavor but also lends a special textural contrast that’s sure to impress your guests.
These variations ensure that your Candy Cane Icebox Cake remains a festive favorite while making it uniquely your own. Enjoy experimenting!
Cooking Tips and Notes for Candy Cane Icebox Cake
Crafting the perfect candy cane icebox cake is all about balancing flavors and textures, making it as delightful to the palate as it is to the eyes during holiday gatherings. Here are some helpful tips to elevate your dessert game.
Choosing the Right Ingredients
- Crushed Candy Canes: Opt for finely crushed candy canes. Not only do they enhance the visual appeal, but they also provide that perfect peppermint crunch. If you can’t find pre-crushed ones, simply pulse them in a food processor!
- Whipped Topping: For a smoother texture, use stabilized whipped cream. It holds its shape better than standard whipped cream, making your cake beautifully layered and presentable for longer.
- Graham Crackers: Experiment with flavored graham crackers, like chocolate or cinnamon, for a twist on the classic recipe. This small change can add a surprising depth of flavor to your cake.
Layering Tips
- Soaking the Graham Crackers: Quickly dip the graham crackers in milk (or a milk alternative) for just a second or two. This ensures they are moist but not overly soggy, maintaining a firm structure for your candy cane icebox cake.
- Assembly: When layering, be generous with the whipped cream and the candy cane pieces. This not only maximizes flavor but also creates a stunning visual when the cake is sliced.
Chill Time
- Overnight Refrigeration: For the best results, allow your candy cane icebox cake to set overnight. This helps the flavors meld beautifully and ensures the crackers absorb moisture, resulting in a dreamy, creamy texture.
Follow these tips, and you’ll be on your way to impressing your friends and family with a sensational holiday dessert!

Serving Suggestions for Candy Cane Icebox Cake
When it comes to serving your delightful candy cane icebox cake, presentation can elevate your dessert game to new heights. Imagine gathering around a table, where this festive treat takes center stage, adorned with toppings that enhance its flavor and visual appeal.
Make it a Showstopper
- Fresh Whipped Cream: A dollop of freshly whipped cream adds a luxurious touch. Just a hint of vanilla extract can make it sing.
- Crushed Candy Canes: For an extra pop of peppermint, sprinkle some crushed candy canes on top. This not only looks beautiful but also brings an added crunch that’s simply delightful.
Complementary Flavors
Consider pairing the candy cane icebox cake with seasonal sides.
- Hot Chocolate: A warm cup of rich hot chocolate can make for the perfect companion. It’s like a hug in a mug.
- Peppermint Bark: Serve slices of peppermint bark on the side for that sweet and crunchy contrast to the cake’s smooth texture.
Thematic Presentation
Present your cake on a festive platter adorned with winter-themed decorations. Adding some sprigs of fresh mint or even mini candy canes can create a charming holiday display.
Perfect Timing
This cake shines at holiday gatherings. Serve it at your next office party or family get-together, and watch as it quickly becomes the star of the event.
By thoughtfully considering these serving suggestions for your candy cane icebox cake, you set the scene for joy and deliciousness, making every bite memorable. Happy indulging!
Time Breakdown for Candy Cane Icebox Cake
Creating a festive Candy Cane Icebox Cake can be a delightful experience, and understanding the time required for each step can help you plan your dessert-making adventure with ease.
Preparation Time
In just about 20 minutes, you can have everything ready to go. You’ll whip up the layers and gather your ingredients, setting the stage for that delicious, creamy cake that’s perfect for any gathering.
Chilling Time
The magic truly happens during the chilling time, which is approximately 4 hours. This allows the layers to meld beautifully, and the flavors will deepen as the cake sets.
Total Time
All combined, expect to spend about 4 hours and 20 minutes making your Candy Cane Icebox Cake. It’s a straightforward process that can deliver a stunning dessert with minimal hands-on time, leaving you with a show-stopper for your holiday celebrations!
Nutritional Facts for Candy Cane Icebox Cake
When you indulge in a festive treat like a candy cane icebox cake, understanding its nutritional profile can help you enjoy it mindfully. This delightful no-bake dessert brings together creamy layers and the holiday spirit, making it a favorite at gatherings.
Calories
A slice of this candy cane icebox cake typically contains around 350 calories. While it’s a special treat, it combines flavors that evoke nostalgia and joy, reminding us of cozy holiday memories spent with family and friends.
Protein
With about 5 grams of protein per serving, this cake isn’t a protein powerhouse but does contain some notable dairy components that can contribute to your daily intake. Enjoying a slice can be part of a balanced approach to dessert.
Sugar
One serving of this candy cane icebox cake packs about 25 grams of sugar. While it’s certainly sweet, consider it a treat to savor during those festive moments. Pair it with a cup of coffee or tea for a balanced dessert experience.
FAQs about Candy Cane Icebox Cake
Creating a delightful candy cane icebox cake can spark curiosity and questions, especially when your friends and family are eager to try a slice. This festive dessert is not just a treat for the taste buds; it also adds a splash of color to your holiday gatherings. Here are some frequently asked questions to help you master this delicious recipe!
How can I make this cake ahead of time?
One of the best features of a candy cane icebox cake is its ability to be prepared in advance. You can assemble the cake a day or two before your event. Just keep it in the refrigerator, allowing the cookies to soften and absorb the cream cheese filling, resulting in a delightful, layered dessert. By the time you serve it, the flavors will harmonize beautifully.
Can I use low-fat cream cheese?
Absolutely! Using low-fat cream cheese is a great way to lighten the dessert without sacrificing much in terms of flavor. Just keep in mind that the texture may be slightly different. The cake may not be as rich and creamy, but it will still be delicious and perfect for your holiday table.
What can I substitute for Oreo cookies?
If you’re not an Oreo fan or have dietary restrictions, there are plenty of alternatives. Consider using chocolate wafer cookies, graham crackers, or even gluten-free cookies to build your layers. The idea is to create a delightful contrast with the creamy filling, so any cookie that complements the candy cane theme will work beautifully!
How should I store leftover cake?
Leftover candy cane icebox cake should be stored in the refrigerator, covered tightly with plastic wrap or in an airtight container. It can last for about 3 to 4 days. However, for the best taste and texture, it’s best enjoyed within the first couple of days. Enjoy your cake adventure!
Conclusion on Candy Cane Icebox Cake
In summary, the candy cane icebox cake is not just a dessert; it’s an experience that brings the holiday spirit to life. With layers of whipped cream, chocolate wafers, and crushed candy canes, every bite is a delightful celebration of flavors and textures. As you prepare this no-bake treat, feel free to customize it—add your favorite flavors or extra toppings to make it uniquely yours. Perfect for gatherings or cozy nights in, this cake will surely impress your friends and family. So grab your ingredients and create a masterpiece that’s as fun to make as it is to eat!
Print
Peppermint Oreo No-Bake Cake
- Total Time: 4 hours 25 minutes
- Yield: 9 servings 1x
- Diet: Vegetarian
Description
This delicious peppermint Oreo cake is a festive and easy no-bake dessert perfect for the holidays!
Ingredients
Scale
- 1 1/2 cups whipping cream (360 ml)
- 10 ounces full-fat cream cheese (283 grams) (brick style, softened to room temperature)
- 1 cup powdered sugar (110 grams) (sifted)
- 1–2 teaspoons peppermint extract (depending on how minty you like it, start with 1 teaspoon)
- red food coloring (I used gel, optional)
- 32 Oreo Cookies (you’ll likely need 50 cookies if using a 9x9 inch pan)
- 1/4 cup milk (for dipping the cookies in)
- 2/3 cup whipping cream (160 ml) (cold, from the fridge)
- 2–4 candy canes
Instructions
- Optionally, line an 8×8 (20×20 cm) or 9×9 inch (23×23 cm) pan with parchment paper, so that there’s an overhang around the edges. If you choose not to line the pan, you will slice and serve the cake from the pan.
- Place the whisk attachment and bowl of your stand mixer (or a large bowl) in the freezer for 10 minutes. Then beat the whipping cream (using the cold bowl and cold whisk attachment) until stiff peaks form. Set aside.
- In a separate large bowl, beat together the cream cheese, powdered sugar, peppermint extract, and a few drops of red food coloring until smooth and creamy. Turn off the mixer a few times and scrape down the bottom and sides of the bowl to ensure there are no lumps. If using food coloring, the color should be slightly darker than you want the final product to be, because it will lighten after you add the whipped cream.
- Using a rubber spatula, fold the whipped cream from step 1 into the cream cheese mixture. I typically do this about 1/2 at a time. Go gently. When finished, it should be an even consistency. You shouldn’t see streaks of dollops of white whipped cream.
- Pour the milk into a shallow bowl. Lightly dunk each cookie in the milk and shake off the excess. If you plan to keep the cake in the fridge overnight before serving, you could skip this step.
- Spread about 2-4 tablespoons of peppermint filling onto the bottom of the pan.
- Add a layer of Oreo cookies on top – for an 8×8 inch (20×20 cm) pan, you’ll do 4 rows of 4 cookies. For a 9×9 inch (23×23 cm) pan, you likely can fit 5 rows of 5 cookies.
- Spread about 1/2 of the remaining filling on top of the Oreo layer.
- Add a second layer of Oreo cookies – again doing 4 rows of 4 cookies, or 5 rows of 5 cookies.
- Spread the remaining peppermint filling on top.
- Cover the pan and place in the fridge to set for at least 4 hours.
- When ready to serve, beat the additional 2/3 cup whipping cream until stiff peaks form. Spread into an even layer on top of the cake. This step can be done in advance if you like.
- Sprinkle the top with crushed candy canes. Note – only do this step right before serving. If the cake is stored with crushed candy canes in the fridge, the candy canes can melt or bleed color due to condensation.
- When ready to slice, if you lined the pan with parchment paper, carefully lift out of the pan using the overhang of the parchment and place on a cutting board.
- Slice the cake using a thin knife, be sure to wipe off the knife with a clean, damp cloth or clean paper towel in between each slice for clean cuts. Lift using a square spatula – I prefer metal.
Notes
- This recipe is best served fresh or within a couple of days to avoid the cookies becoming too mushy.
- You can adjust the amount of peppermint extract to your taste.
- If desired, you can decorate the top with extra Oreo crumbs or whipped cream.
- Prep Time: 25 minutes
- Category: Dessert
- Method: No-Bake
- Cuisine: American
Nutrition
- Serving Size: 1 slice
- Calories: 320
- Sugar: 24g
- Sodium: 150mg
- Fat: 22g
- Saturated Fat: 12g
- Unsaturated Fat: 8g
- Trans Fat: 0g
- Carbohydrates: 29g
- Fiber: 1g
- Protein: 3g
- Cholesterol: 80mg